How Long Does It Take for Water to Heat Up Again You Relight the Pilot Light
Dan has been in the HVAC industry for 23 years with experience ranging from installation and service to sales and distribution.
The Pilot Light of a Water Heater
Lighting the pilot on a hot water tank may seem simple to some, but as a home service provider for over 15 years, I can tell you that I'd made more than a few dollars performing this task for people.
Though many modern gas burning appliances have switched over to hot surface or electronic ignition, there are still a lot of standing pilot systems manufactured and in use today. If you own one of these standing pilot type systems, you should know how to check and light your pilot.
The following steps will explain how to light your pilot, what to look for when doing so, and a few different methods you can use to get the fire going.
This is what a sealed combustion chamber might look like on this type of unit. The little square here in the panel is your looking glass.
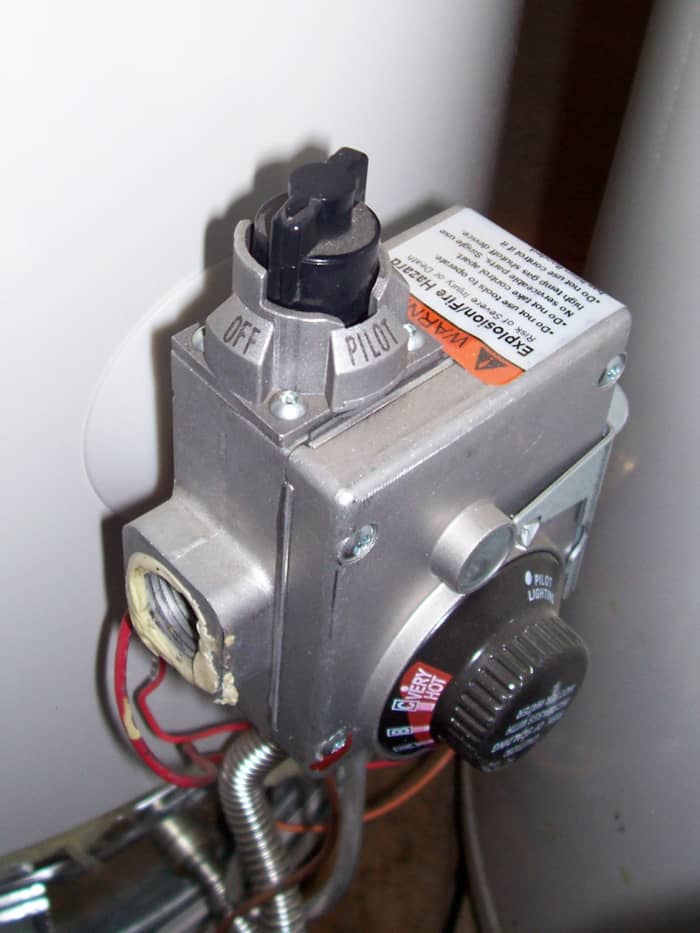
Notice the differences on this type of control module compared to the older tank style. The small knob on top is a control and a button.
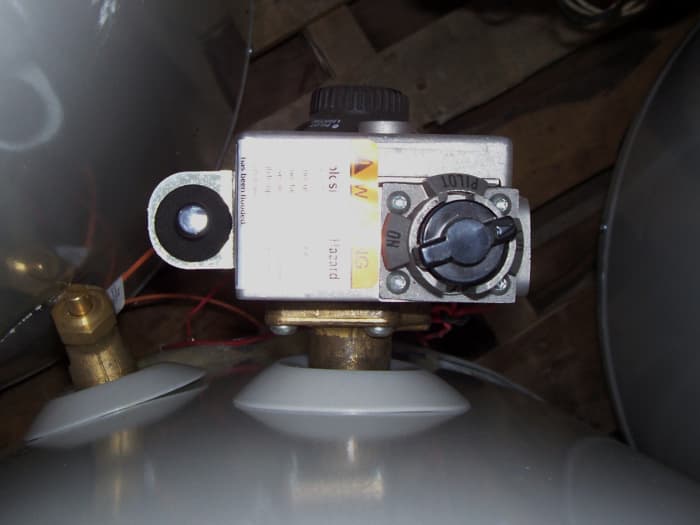
A top view so that you can see the electronic spark button to the left.
Lighting a Sealed Combustion Pilot
We'll start with the more modern sealed combustion type hot water tank system. With a sealed combustion chamber, there is no need to (nor should you) access the burner assembly. Everything you need to light this pilot is mounted right to the burner control module and there is a looking glass in the access panel that you can use to visually verify ignition. This access is bolted shut for a reason and should only be accessed by a licensed professional.
- Turn the gas control knob on top to the "pilot" position.
- Press and hold down the control knob itself to allow gas flow.
- Press the electronic spark button located on or mounted to your control module until you hear it click. You may need to click it a few times before the pilot is lit as there may be a bit of air in the line that takes a few seconds to "bleed" out.
- Visually confirm ignition and keep holding down the knob for approximately 30-45 seconds so that the pilot can heat up the thermocouple enough to confirm ignition to the thermostat in the control module. If the thermocouple doesn't heat up enough, the pilot will go back out.
- Let go of the control knob and visually confirm that the pilot stayed lit.
- Turn the gas control knob to the "on" position. If the pilot was out long enough for the water temperature to cool, the burners should kick on within seconds. If the water hasn't cooled, there may be no call for the burners to come on. Don't be surprised if it doesn't fire up right away.
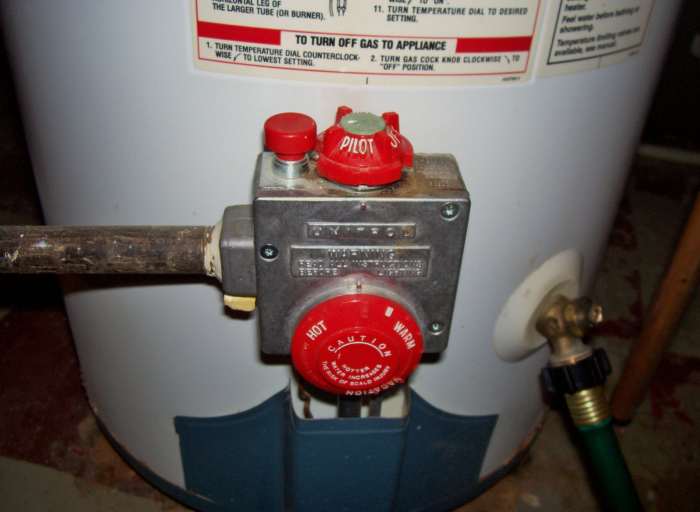
With the notch lined up with the button and the "pilot" in line with the indicator, you are in the proper position.

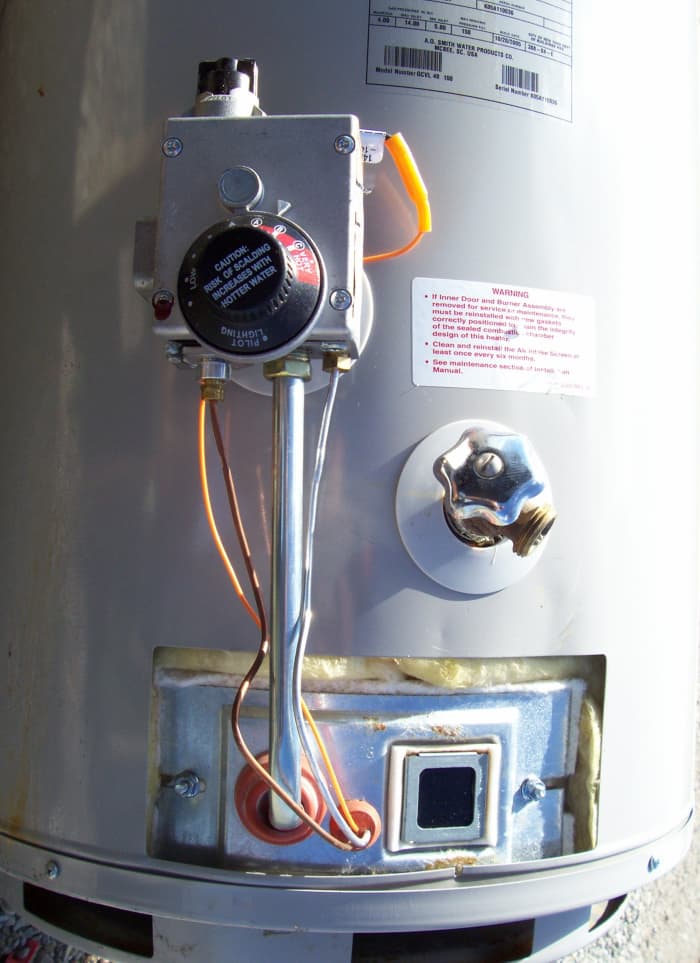
Here is what an open combustion burner assembly might look like. I've removed the 2 panels so you can see what they look like.
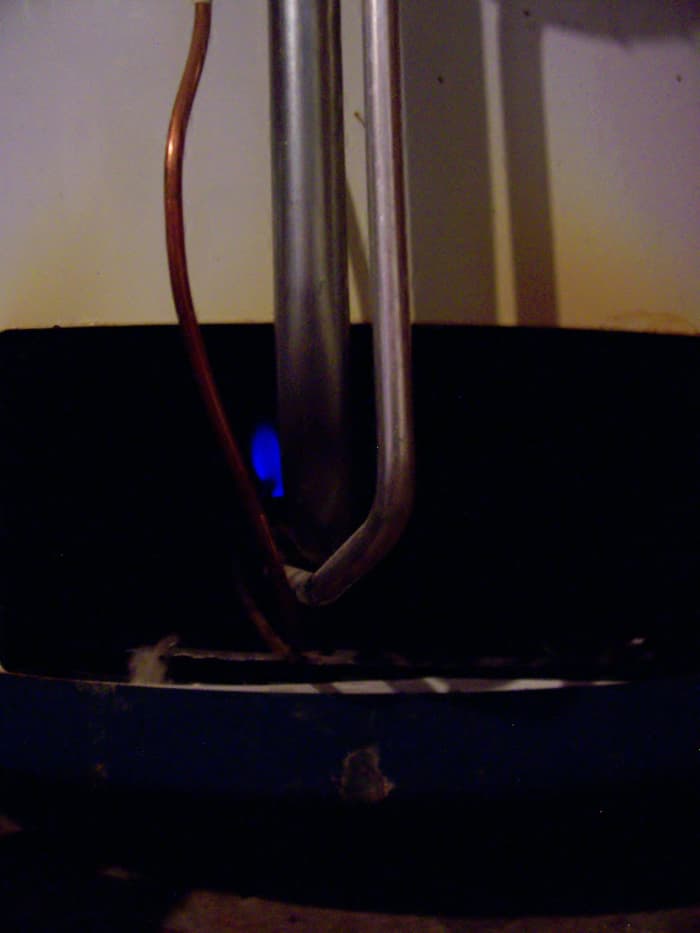
The copper line you see here in this photo leads to the thermocouple and the aluminum tubing leads to the orifice where you'll place your lighter. The 2 come together inside the chamber.
Lighting an Open Combustion Pilot
This process is similar to the sealed combustion tank except that you will need to provide the flame to light the pilot yourself instead of having an electronic ignition do it for you.
Scroll to Continue
Read More From Dengarden
- Turn the gas control knob to pilot so that the notch in the dial is lined up with the gas supply button. This way, you'll be able to press the button all the way down as required.
- Remove the burner compartment panels. Both should come off rather easily by lifting up and out.
- Place your choice of flame source (lighter, match, etc...) into the chamber so that the flame is underneath the orifice of the pilot supply line and light it.
NOTE: I like to do 3, then 4. Though the two steps can be switched, I feel it's safer to introduce the flame prior to supplying gas to avoid even a slim chance of gas build up. I prefer to err on the side of caution.
- Press and hold down the pilot gas supply button.
- Visually confirm that the pilot is lit. If so, continue to hold down the pilot gas supply button for approximately 30-45 seconds to heat the thermocouple.
- Release the button and again, visually confirm that the pilot stayed lit. If the pilot stayed on...
- Turn the gas control knob to the "on" position.
Again, the water heater's burners may or may not come on right away depending on your circumstances.
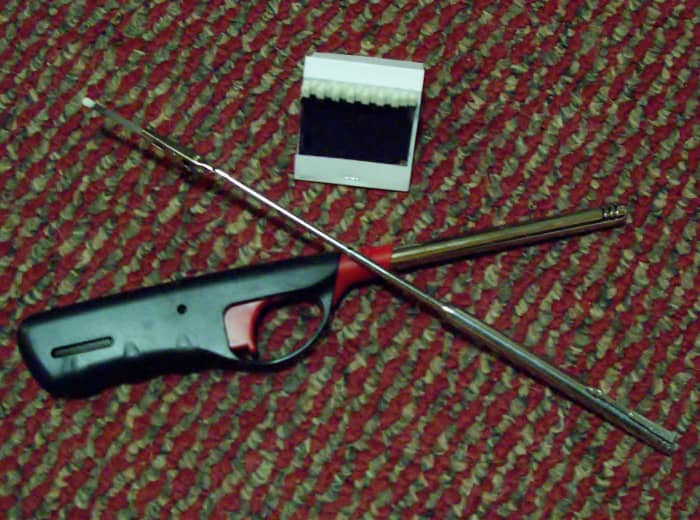
Things You Can Use to Light a Pilot Light
- Long stemmed lighter
- Long stemmed matches
- Short matches with hemostatic clamp
- A long, thin candle
Don't Have a Lighter or Matches?
Try using lighting a long slim candle on the stove and lighting the pilot with that. Lay tin foil underneath the pilot when doing this as to avoid wax dripping on the bottom of the chamber.
A Quick Water Heater Inspection You Can Do
- Check around the area and the bottom of the unit for dampness and rust (a.k.a. blisters). This could be telling you to prepare for a new tank.
- Check that your T&P valve is working.
- Feel the tank. Is it warm? If so, you may want to consider adding a layer of insulation.
- Test your thermostat control. You can do this by turning it all the way down to shut of the burners if they're on. The burners should shut down at this point and then when you turn it back up, they should come back on within seconds. If not, you control may be bad and you should contact a professional.
- Lastly, you may want to ask yourself when, "When was the last time I flushed my water heater?" This is something that should be done on a yearly basis.
Author's Qualifications
- 15 years HVAC Installation and Service
- 5 years home improvement contractor
- 2+ years involved in product safety, performance and certification testing
- EPA & OSHA certification
- Completed coursework in electrical theory, thermodynamics, and refrigeration
This article is accurate and true to the best of the author's knowledge. Content is for informational or entertainment purposes only and does not substitute for personal counsel or professional advice in business, financial, legal, or technical matters.
© 2012 Dan Reed
Dan Reed (author) on April 22, 2012:
Thanks Mmargie. It can be nerve racking for those who've never done it before but I always take a lot of time thinking about my instructions and choosing topics that are safe for anyone to try if the instructions are followed.
Mmargie1966 from Gainesville, GA on April 21, 2012:
Voted up and interesting. I have always been afraid of gas appliances. I had a gas stove once, and my husband had to light it...lol
I feel a bit better reading specific instructions on your hub, although, I don't have any gas appliances at this time. I will keep this hub saved in case that changes.
cardwellretiould1982.blogspot.com
Source: https://dengarden.com/appliances/How-to-Light-the-Pilot-on-Your-Water-Heater
0 Response to "How Long Does It Take for Water to Heat Up Again You Relight the Pilot Light"
Post a Comment